

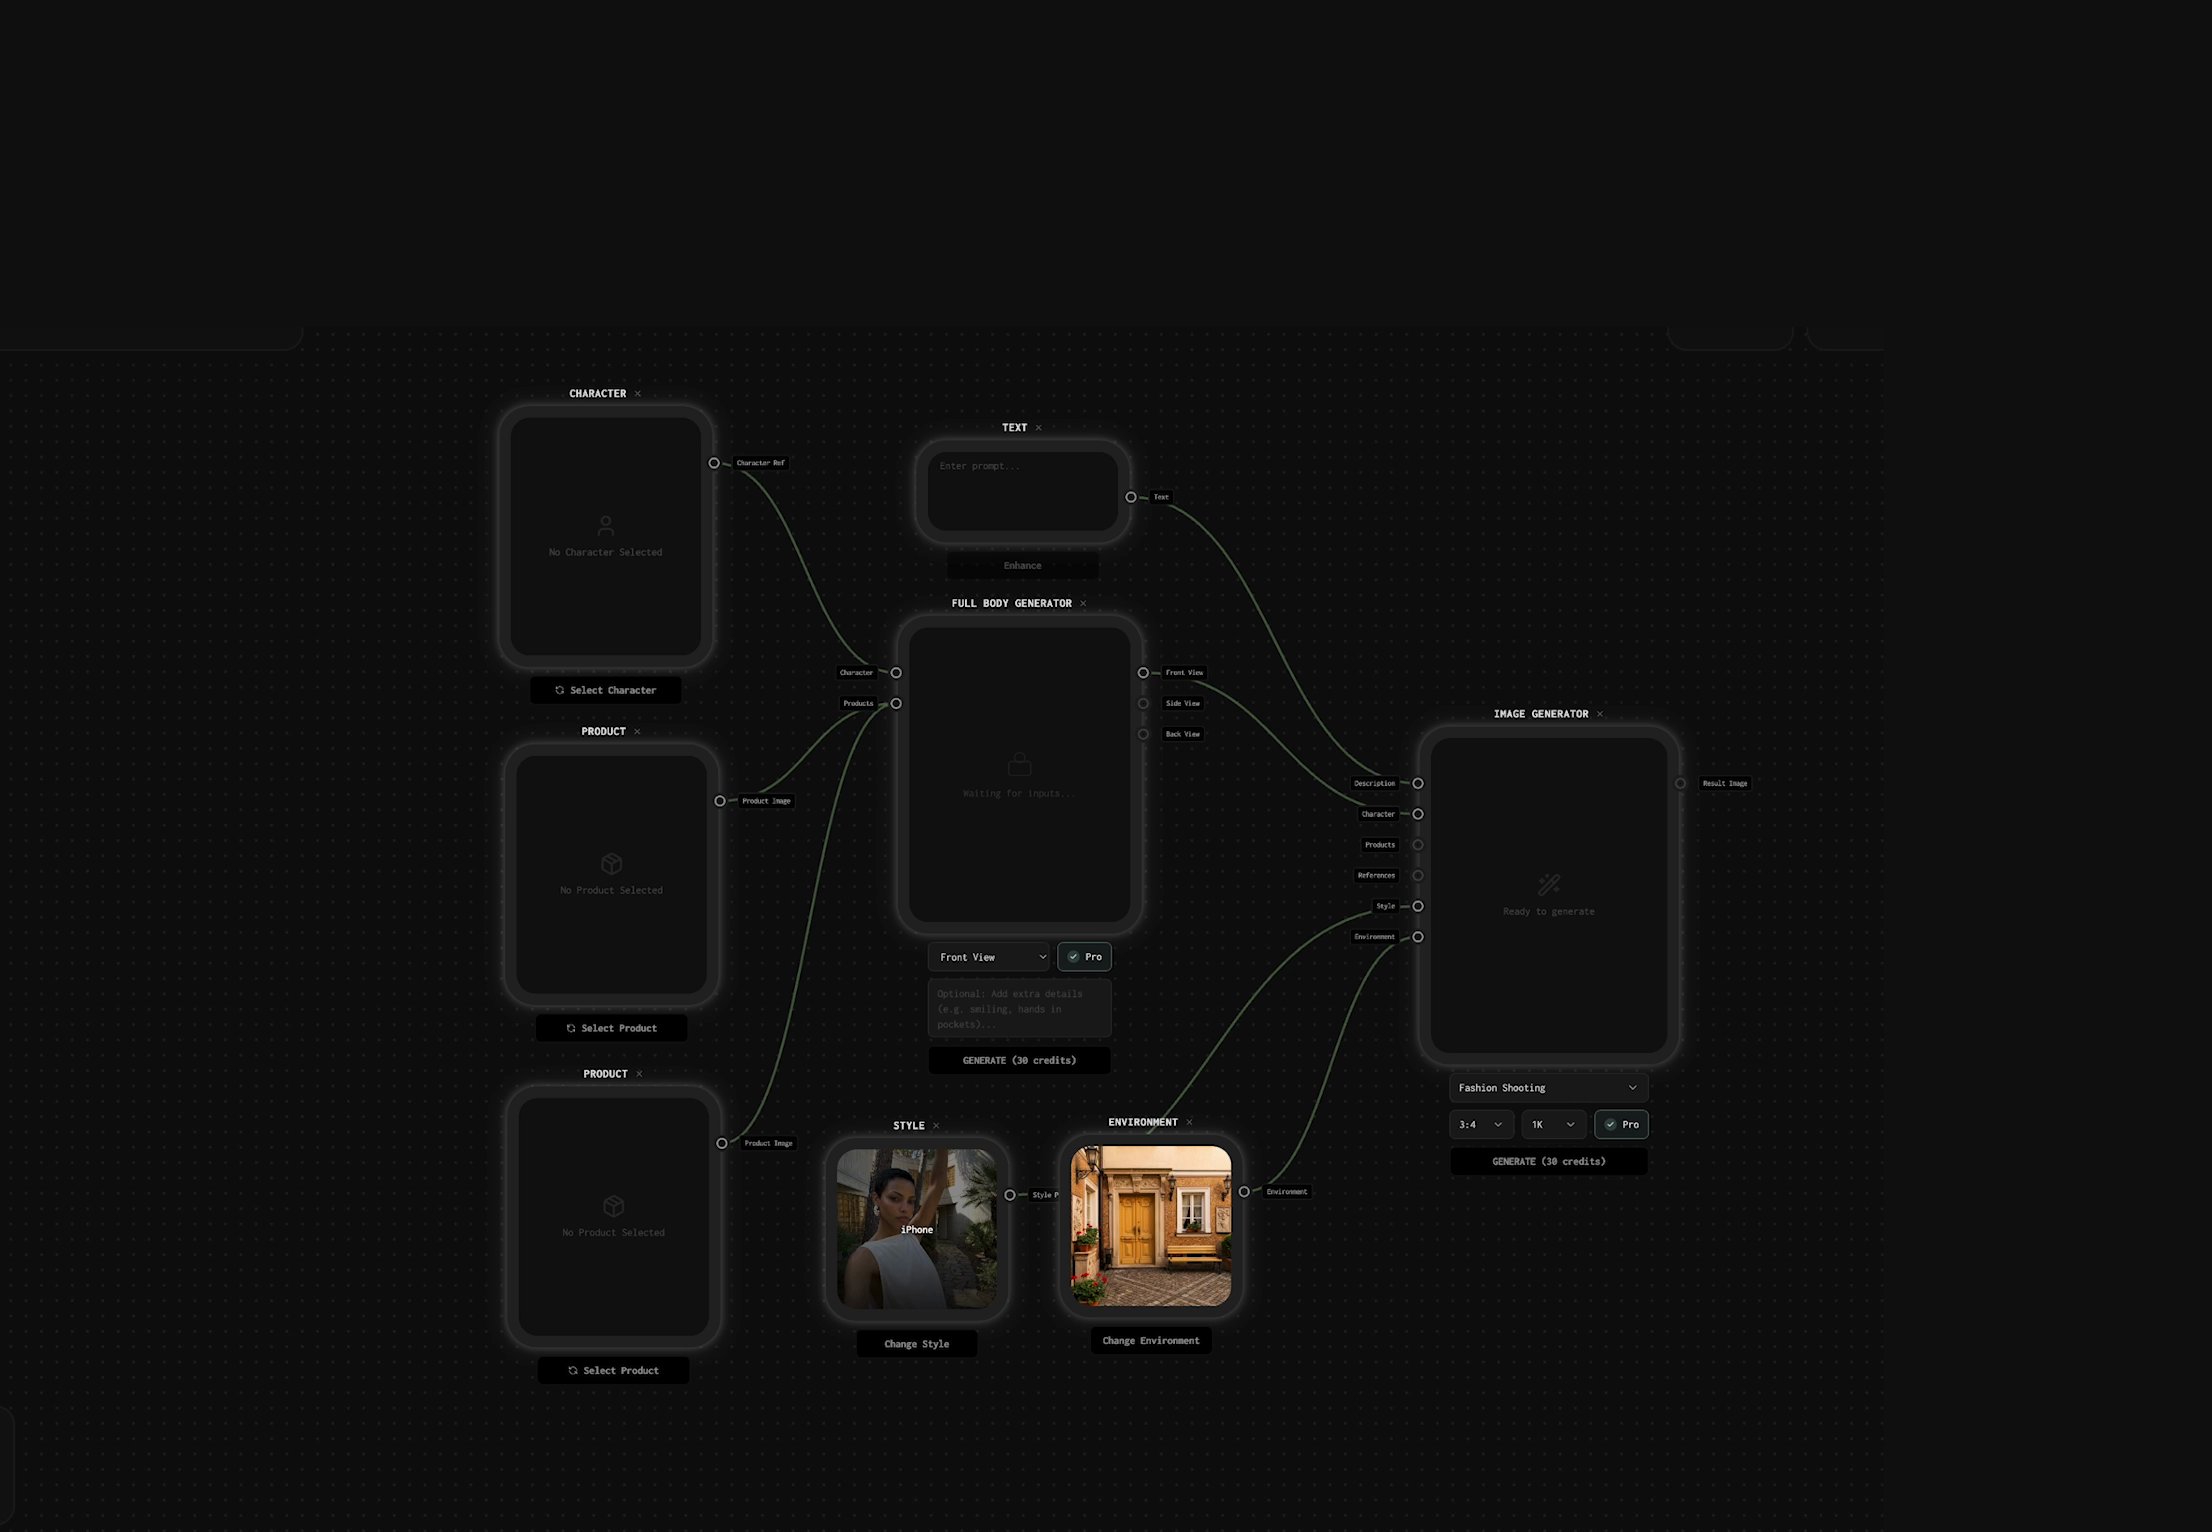
The canvas at a glance
When you open a project in the Rainfrog studio, you start on a blank canvas. Add nodes from the floating dock on the left (or from the canvas context menu), wire them together, and click Generate. The canvas auto-saves your work as you go, so you never lose progress mid-session. Think of the canvas as a visual recipe. Each node you place represents one ingredient — a product, a character, a style, a setting — and the connections between them tell Rainfrog how those ingredients relate in the final output. You can also drop a template from the dock (Fashion Shooting, Product Still Life, or UGC Content) to place a pre-wired graph and start faster.Node types
Rainfrog nodes fall into four groups.Asset and input nodes
Specialized generators
Output nodes
Utility
Rainfrog is designed for creative direction, not prompt engineering. Most workflows run without writing prompts. The optional Text node is there when you want extra direction — not as the primary way to drive the studio.
How the graph becomes a generation
When you click Generate on an Image Generator, Full Body Generator, Outfit Sheet Generator, or Video Generator, Rainfrog resolves every connected input and assembles the generation automatically. You stay focused on which assets are wired — not on crafting a prompt from scratch.Connecting nodes
To connect two nodes, drag from the output handle (the dot on the right edge) of a source node to the input handle (the dot on the left edge) of a generator or other target node. A wire appears between them, confirming the connection. A few things to know:- You can connect multiple products or characters to a single Image Generator when the handles allow it.
- Input labels on the generator tell you what each handle expects (for example Products, Character, References, Style, Environment).
- To remove a connection, click the wire and press Delete, or drag the handle away from its target.
Undo, redo, and auto-save
Every change you make on the canvas — adding a node, connecting wires, choosing an asset — is auto-saved to your project. You don’t need to manually save. If you make a mistake or want to backtrack, use the standard keyboard shortcuts:- Undo:
Cmd + Z(Mac) /Ctrl + Z(Windows) - Redo:
Cmd + Shift + Z(Mac) /Ctrl + Shift + Z(Windows)
Your node configuration stays inside the project. Come back later, swap a node, and regenerate anytime.