> ## Documentation Index
> Fetch the complete documentation index at: https://docs.rainfrog.ai/llms.txt
> Use this file to discover all available pages before exploring further.
# Rainfrog Quickstart: From Account to First Campaign
> Create your first Rainfrog project, build a workflow from a template, connect your assets, and generate your first campaign images in minutes.
This guide walks you from creating your account to generating your first campaign images. By the end, you'll have a working workflow on the canvas and outputs you can iterate on immediately.
 If you don't have assets ready, every asset node has a built-in library you can use — no uploads required for your first run.
Go to [app.rainfrog.ai/signup](https://app.rainfrog.ai/signup) and create your account (email or Google). You can explore the studio with a free account, but **generating images and video requires an active paid plan** with credits. Open **Manage Plan** (or pricing after signup) and choose Hobby, Pro, or Ultra.
Open the **Projects** tab. Click **New Project**, give it a name, and create it. The canvas opens and auto-saves as you work.
In the studio, open the floating dock on the left and pick a template:
* **Fashion Shooting** — on-model shots with product and character
* **Product Still Life** — styled product placement in an environment
* **UGC Content** — creator-style social visuals
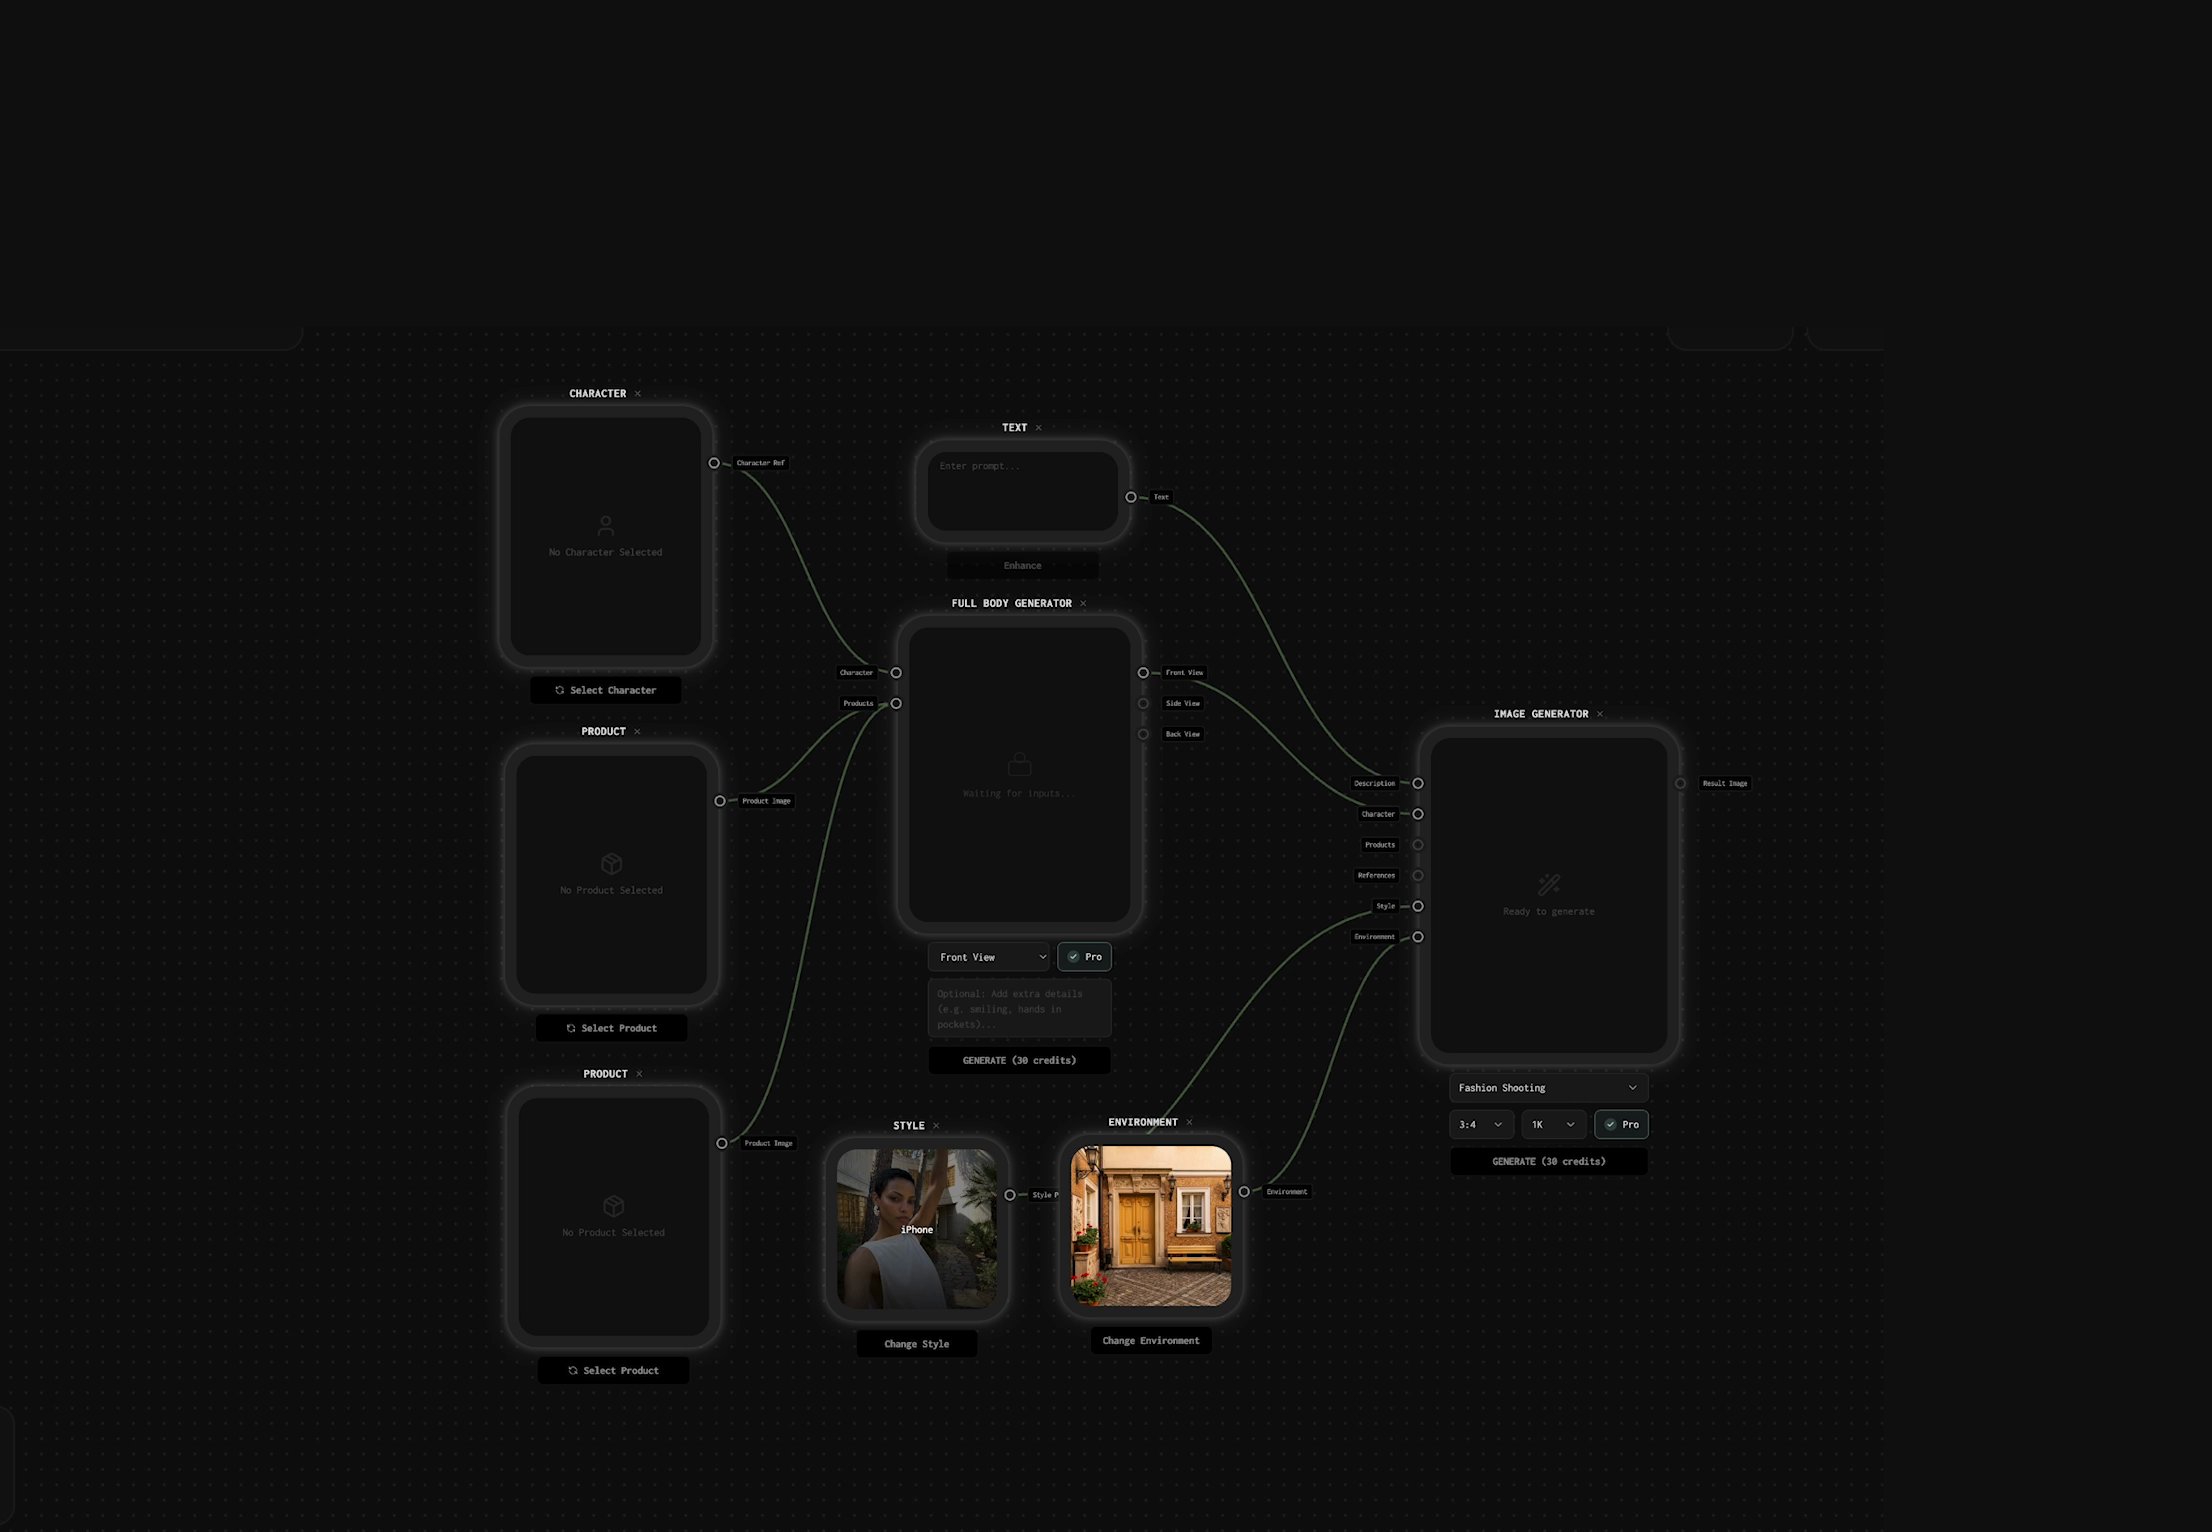
Dropping a template places a pre-wired set of nodes on your canvas.
Replace placeholders with your own assets — or keep built-in library assets for the first run:
1. **Product** — select a product from your library or upload one under **Assets → Products**
2. **Character** — choose a stock or custom character
3. **Style** — pick a built-in or custom style on the Style node
4. **Environment** — set the scene from the library or your customs
Connect each asset to the **Image Generator** by dragging from each node's output handle to the matching input on the generator.
On the Image Generator, choose a model and settings, check the credit cost shown on the node, then click **Generate**. When the run finishes, the result appears on the node (with earlier runs kept in history).
From here, you can:
* **Swap a node** — change an asset and generate again
* **Add Full Body or Video** — extend the same project with specialized generators
* **Download** — save outputs once your plan allows downloads
## Find your way around
| Nav item | What it’s for |
| --------------- | -------------------------------------- |
| **Projects** | Your canvases |
| **Workflows** | Browse and clone gallery workflows |
| **Assets** | Products, Characters, and Environments |
| **Manage Plan** | Credits, upgrades, top-ups, billing |
| **Settings** | Profile and password |
## Keep exploring
Deep-dive into how nodes, ports, and connections work on the Rainfrog canvas.
A step-by-step walkthrough of building a complete fashion campaign from scratch.
If you don't have assets ready, every asset node has a built-in library you can use — no uploads required for your first run.
Go to [app.rainfrog.ai/signup](https://app.rainfrog.ai/signup) and create your account (email or Google). You can explore the studio with a free account, but **generating images and video requires an active paid plan** with credits. Open **Manage Plan** (or pricing after signup) and choose Hobby, Pro, or Ultra.
Open the **Projects** tab. Click **New Project**, give it a name, and create it. The canvas opens and auto-saves as you work.
In the studio, open the floating dock on the left and pick a template:
* **Fashion Shooting** — on-model shots with product and character
* **Product Still Life** — styled product placement in an environment
* **UGC Content** — creator-style social visuals
Dropping a template places a pre-wired set of nodes on your canvas.
Replace placeholders with your own assets — or keep built-in library assets for the first run:
1. **Product** — select a product from your library or upload one under **Assets → Products**
2. **Character** — choose a stock or custom character
3. **Style** — pick a built-in or custom style on the Style node
4. **Environment** — set the scene from the library or your customs
Connect each asset to the **Image Generator** by dragging from each node's output handle to the matching input on the generator.
On the Image Generator, choose a model and settings, check the credit cost shown on the node, then click **Generate**. When the run finishes, the result appears on the node (with earlier runs kept in history).
From here, you can:
* **Swap a node** — change an asset and generate again
* **Add Full Body or Video** — extend the same project with specialized generators
* **Download** — save outputs once your plan allows downloads
## Find your way around
| Nav item | What it’s for |
| --------------- | -------------------------------------- |
| **Projects** | Your canvases |
| **Workflows** | Browse and clone gallery workflows |
| **Assets** | Products, Characters, and Environments |
| **Manage Plan** | Credits, upgrades, top-ups, billing |
| **Settings** | Profile and password |
## Keep exploring
Deep-dive into how nodes, ports, and connections work on the Rainfrog canvas.
A step-by-step walkthrough of building a complete fashion campaign from scratch.