> ## Documentation Index
> Fetch the complete documentation index at: https://docs.rainfrog.ai/llms.txt
> Use this file to discover all available pages before exploring further.
# How Rainfrog Generates AI Campaign Images and Video
> Learn how Rainfrog traverses your node graph to produce campaign-ready images and video, and how models, credits, and iteration work.
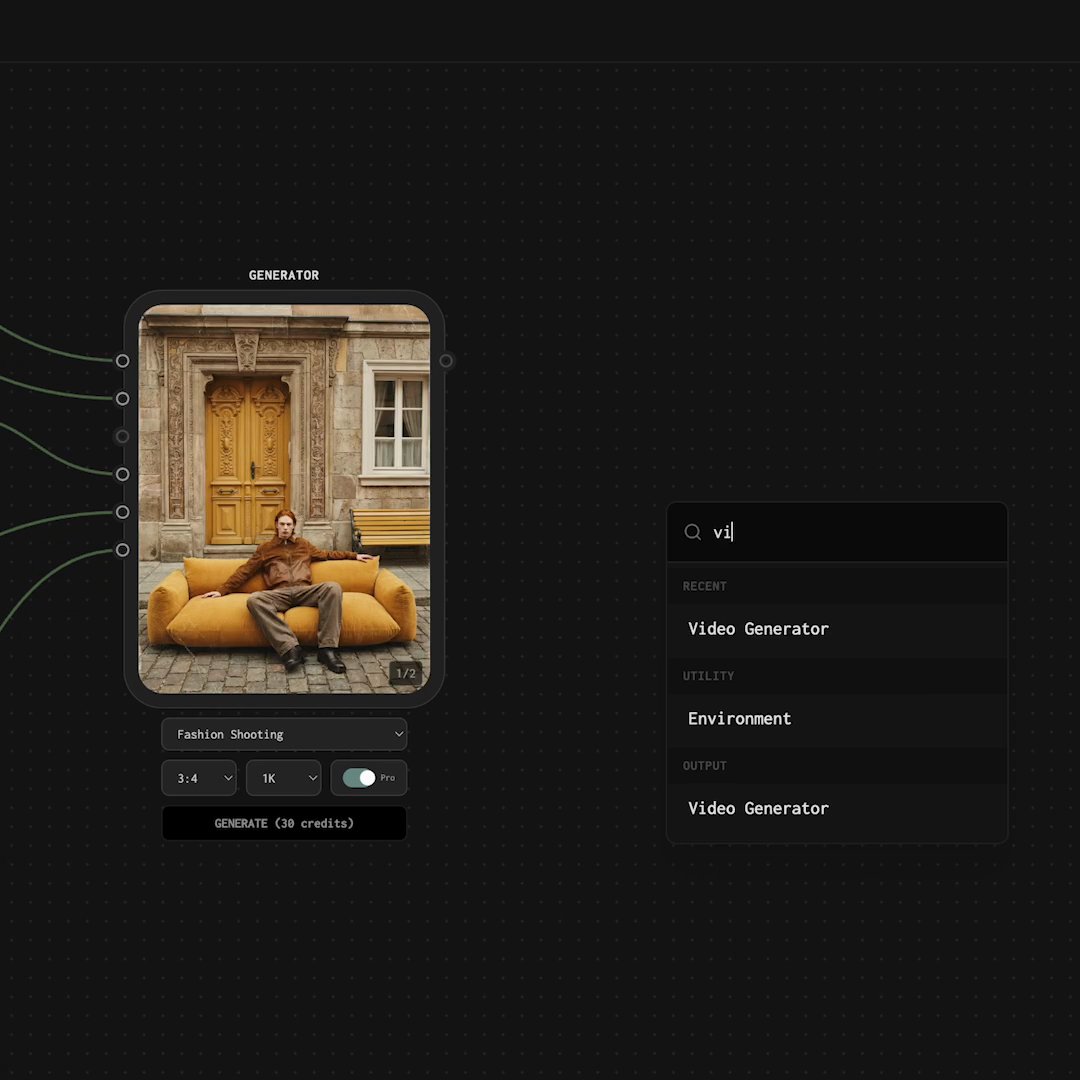
When you click **Generate**, Rainfrog traverses your node graph, resolves every connected asset, and assembles the generation automatically. Within seconds, it begins producing campaign-ready images or video — without you writing a full prompt by hand. Outputs are meant to feel like a coordinated creative shoot, not isolated one-offs.
 ## Image generation
Use the **Image Generator** node for stills. Wire in a product, character, style, environment, optional text, and optional reference images, then choose an image **model** and settings (such as aspect ratio and resolution) on the node.
Each run produces a new result on that node. Previous results stay in the node's history so you can compare iterations. Specialized generators work differently:
* **Full Body Generator** — produces **front**, **side**, and **back** views in one run
* **Outfit Sheet Generator** — produces an outfit / flat-lay sheet
Reuse the same character, product, style, and environment across runs (or across several generators in one project) to keep a campaign visually consistent.
## Choosing an image model
The Image Generator exposes a model picker. Models differ in fidelity, speed, and credit cost. Broadly:
| Kind of model | Best for |
| ------------------------- | ------------------------------------------------------------ |
| **Faster / standard** | Drafts, exploration, quick iteration |
| **Higher-fidelity / Pro** | Final campaign frames, client delivery, finer product detail |
Exact names and options appear in the studio (for example Gemini Flash–class and Nano Banana / Seedream–class models). The **credit cost for your current settings is shown on the generator before you run**, so you always know what a click will spend.
Iterate with a faster model while you lock composition and casting. Switch to a higher-fidelity model when you are ready to deliver.
## Video generation
To produce motion, add a **Video Generator** node. Video is a separate node from Image Generator — you do not flip an image node into video mode.
The Video Generator lets you pick a **video model**. Each model expects different inputs (for example a starting image, first and last frames, or extra image/video references). Connect the inputs shown on the node for the model you selected, then generate.
Video uses more credits than a typical still, and runtime depends on clip length and model. Details: [Video generation](/guides/video-generation).
## Credits
Each generation draws from your credit balance. Cost depends on the node type, model, and settings you chose. Your balance is visible in the studio header, and the node shows the cost before you click **Generate**.
* Monthly plan credits refresh on your billing date and **roll over** when unused
* One-time **top-ups** from **Manage Plan** stay available until you use them
If you run low mid-cycle, open **Manage Plan** and choose **Top up credits** or **Buy 1,000 credits** without changing your plan tier.
## Working while generation runs
Rainfrog processes generations in the background so you can keep editing the canvas. The studio shows in-progress jobs in the generation queue so you can track what is still running.
## Reviewing and iterating
After a run completes, the output appears on the generator node. From there:
Open the image or video on the node. Compare it against earlier history entries on the same node when you want side-by-side context.
Decide which element to adjust — environment, style, character, product, references, or model settings. Each maps to a node or control on the canvas.
Change the asset on a node, reconnect wires, or adjust model settings. You do not need to rebuild the whole workflow.
Click **Generate** for a fresh result. Earlier outputs remain in history so you can pick the strongest frame.
Iterating is fast because changing one node only changes one variable. You keep the rest of the graph — character, style, product — consistent while you dial in the piece you care about.
## Image generation
Use the **Image Generator** node for stills. Wire in a product, character, style, environment, optional text, and optional reference images, then choose an image **model** and settings (such as aspect ratio and resolution) on the node.
Each run produces a new result on that node. Previous results stay in the node's history so you can compare iterations. Specialized generators work differently:
* **Full Body Generator** — produces **front**, **side**, and **back** views in one run
* **Outfit Sheet Generator** — produces an outfit / flat-lay sheet
Reuse the same character, product, style, and environment across runs (or across several generators in one project) to keep a campaign visually consistent.
## Choosing an image model
The Image Generator exposes a model picker. Models differ in fidelity, speed, and credit cost. Broadly:
| Kind of model | Best for |
| ------------------------- | ------------------------------------------------------------ |
| **Faster / standard** | Drafts, exploration, quick iteration |
| **Higher-fidelity / Pro** | Final campaign frames, client delivery, finer product detail |
Exact names and options appear in the studio (for example Gemini Flash–class and Nano Banana / Seedream–class models). The **credit cost for your current settings is shown on the generator before you run**, so you always know what a click will spend.
Iterate with a faster model while you lock composition and casting. Switch to a higher-fidelity model when you are ready to deliver.
## Video generation
To produce motion, add a **Video Generator** node. Video is a separate node from Image Generator — you do not flip an image node into video mode.
The Video Generator lets you pick a **video model**. Each model expects different inputs (for example a starting image, first and last frames, or extra image/video references). Connect the inputs shown on the node for the model you selected, then generate.
Video uses more credits than a typical still, and runtime depends on clip length and model. Details: [Video generation](/guides/video-generation).
## Credits
Each generation draws from your credit balance. Cost depends on the node type, model, and settings you chose. Your balance is visible in the studio header, and the node shows the cost before you click **Generate**.
* Monthly plan credits refresh on your billing date and **roll over** when unused
* One-time **top-ups** from **Manage Plan** stay available until you use them
If you run low mid-cycle, open **Manage Plan** and choose **Top up credits** or **Buy 1,000 credits** without changing your plan tier.
## Working while generation runs
Rainfrog processes generations in the background so you can keep editing the canvas. The studio shows in-progress jobs in the generation queue so you can track what is still running.
## Reviewing and iterating
After a run completes, the output appears on the generator node. From there:
Open the image or video on the node. Compare it against earlier history entries on the same node when you want side-by-side context.
Decide which element to adjust — environment, style, character, product, references, or model settings. Each maps to a node or control on the canvas.
Change the asset on a node, reconnect wires, or adjust model settings. You do not need to rebuild the whole workflow.
Click **Generate** for a fresh result. Earlier outputs remain in history so you can pick the strongest frame.
Iterating is fast because changing one node only changes one variable. You keep the rest of the graph — character, style, product — consistent while you dial in the piece you care about.